Beach Nail Designs
Your suitcase is packed, but your nails still look like they belong at your desk. Sound familiar? These beach nail designs give you ten ways to bring a little ocean color to your manicure, from clean turquoise tips to glossy blue marble. My pick would be a single wave accent on each hand because it gives a simple manicure just enough movement.
Whether you’re booking a salon appointment or painting your nails the night before you leave, you’ll find a look that suits your time and nail length. Some ideas take only two colors and a toothpick. Others are worth saving as a reference photo if you love a detailed set of beach vacay nails.
1. Turquoise French Tips
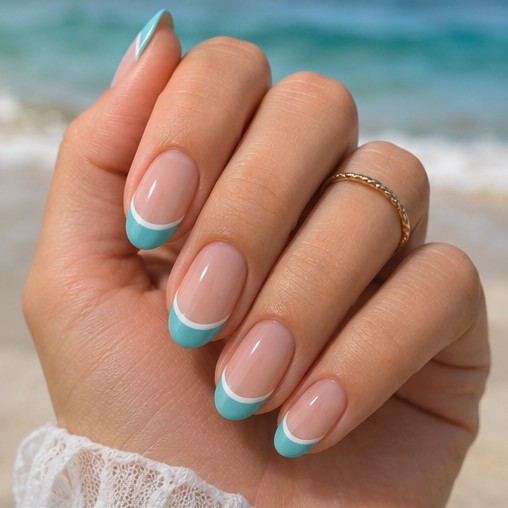
Turquoise French tips look like the bright strip of water you see right where the waves break. Start with a sheer pink base, then paint a curved turquoise edge. Add a hairline of white just below the turquoise if you want the tips to stand out a little more.
Keep the color band slim on short round nails so you can still see plenty of the pink base. On almond nails, carry the turquoise a little farther down the sides to emphasize the shape. DIY trick — rest your painting hand on a table and rotate the finger you’re painting to help guide the curve.
2. Pink and Orange Sunset Ombré
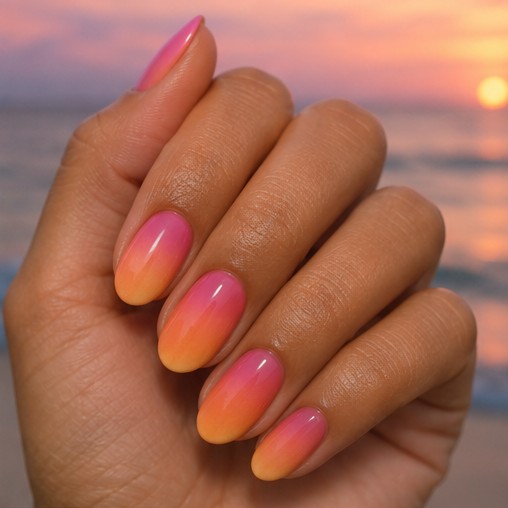
Want your nails to match that sunset photo you’ll take about twelve times? Blend coral pink into juicy orange, then add a little peach between them if you want a softer transition. The blend can run from the cuticle to the tip or diagonally across the nail for a more playful look.
For regular polish, paint overlapping stripes on a small makeup sponge and dab gently onto a dry base color. Build the blend with light passes, letting each one set briefly. Add a clear top coat to smooth the surface and bring out the gradient. IMO, the pink-to-orange version looks especially good with a simple white outfit.
3. Seafoam Green Nails With White Waves
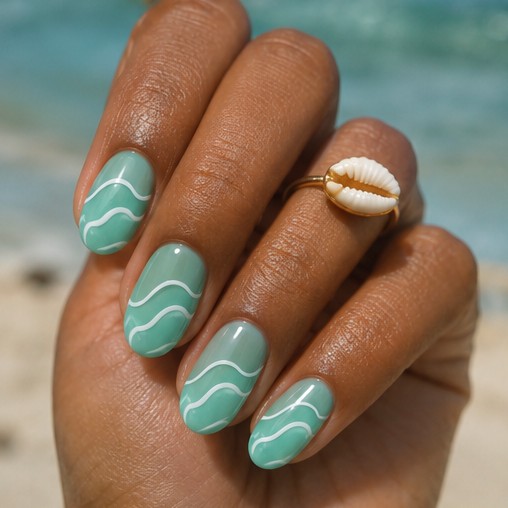
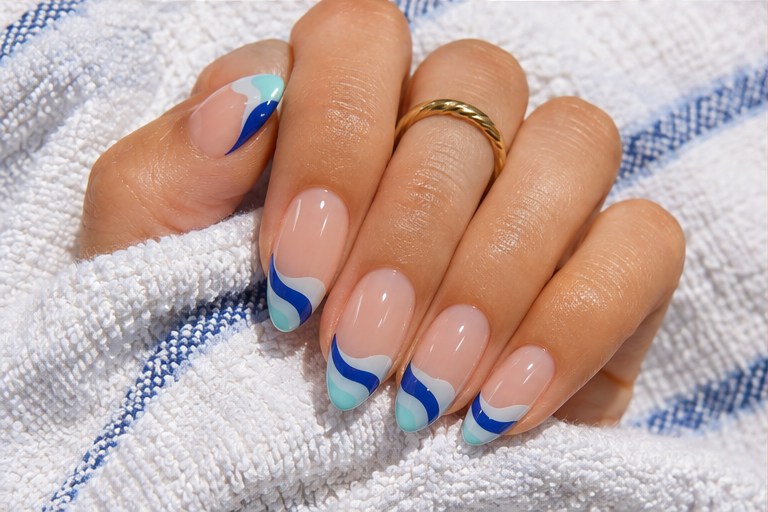
Seafoam green is an easy choice if you like coastal colors that feel soft. Paint the nails seafoam, then draw a loose white wave across one or two of them. Change the curve slightly from nail to nail so the lines feel like ripples.
For a quick version, start near one sidewall and pull a thin brush in a shallow S toward the opposite side. Wipe most of the polish off the brush first so the line stays narrow. A single wave per accent nail gives the design room to breathe, especially on a short manicure.
4. Pearly White Shell Nails
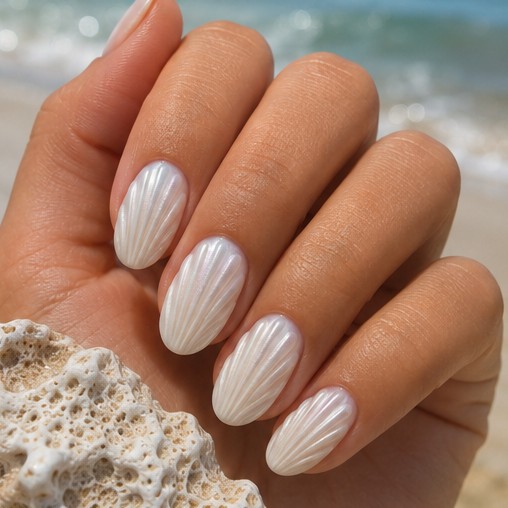
Think of the inside of a shell when you pick your polish. A pearly white or pale ivory base catches the light from different angles, and fine ridges give an accent nail that familiar seashell shape. This one pairs nicely with a linen outfit or a beach wedding dress.
At the salon, ask for a fan of shell ridges on one nail per hand and a smooth pearl finish on the rest. At home, paint thin white lines that spread outward from a single point near the cuticle. Keep the spacing a little wider toward the tip. That small detail makes the lines read as a shell even when the design is flat.
5. Coral Hibiscus Beach Nails
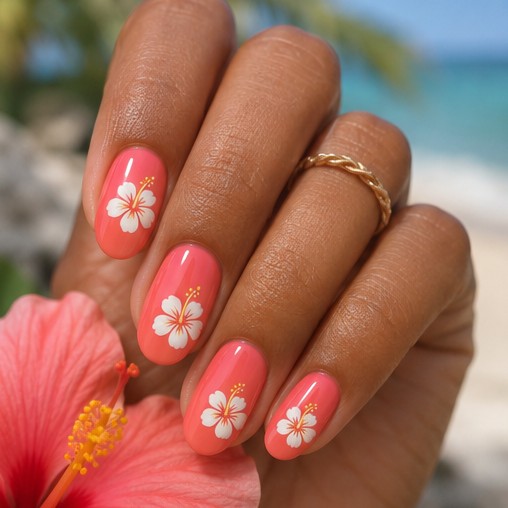
A pop of coral and a few white hibiscus flowers give you the look of a tropical print on your fingertips. Use a warm coral base, then place one flower off-center on a ring finger. Leave a few petals cropped at the edge to make the flower look like part of a larger pattern.
How do you make the petals without a fancy brush? Place five small white dots in a circle with a dotting tool, then drag the inner edge of each dot toward the center. Finish with a tiny yellow or pink dot once the petals have set. Two accent flowers per hand are plenty if you want the coral to stay the focus.
6. Navy and White Nautical Stripes
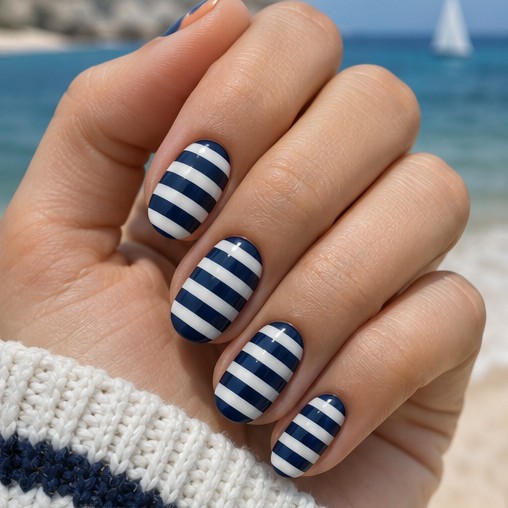
Navy and white stripes give you a crisp beach look with just two bottles of polish. Try white on most nails and add navy stripes to the index and ring fingers. Thin horizontal lines feel classic, while one diagonal stripe gives the set a sportier look.
Let the white dry fully before using nail striping tape. Lay the tape where you want the white lines to remain, brush on a thin coat of navy, and lift the tape while the navy is still wet. FYI, two well-spaced stripes are often easier to place on short nails than three or four. A glossy finish makes the blue look especially rich.
7. Sandy Nude Nails With Gold Foil
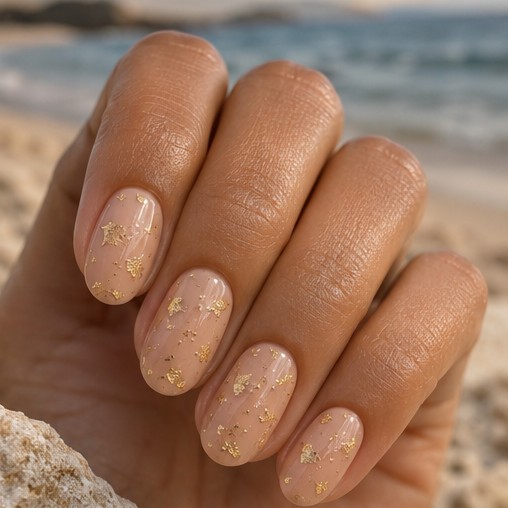
A sandy nude manicure looks right at home against woven beach bags and gold jewelry. Pick a beige, caramel, or warm tan that gives you the amount of contrast you want against your skin. Add tiny gold foil flakes near a corner of the nail, where they can catch the light without covering the base.
If you’re working with regular polish, use tweezers to set a small foil flake into slightly tacky clear polish. Press it flat before you seal it so the edges sit smoothly. Like a little asymmetry? Cluster most of the foil on one accent nail and scatter a few smaller pieces across the next.
8. Lemon Yellow Nails With Blue Dots
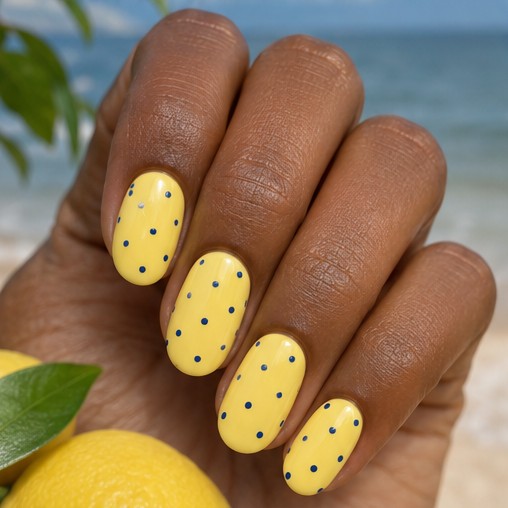
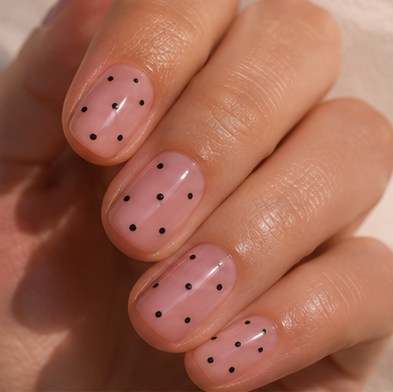
Lemon yellow feels sunny, and a few blue dots give it the look of a painted beach umbrella. Choose a creamy yellow for a softer set or a brighter shade if you want the manicure to pop in photos. Cobalt and sky blue both work, so pick the one you’d reach for in your summer wardrobe.
Touch a clean toothpick tip into blue polish and test a few dots on scrap paper. Use a light touch for the smallest dots, and reload the tip as the polish thickens. Start with a cluster near one corner of each accent nail. Leave the other nails solid yellow for an easy manicure you can finish in one sitting.
9. Milky Pink Nails With Tiny Starfish
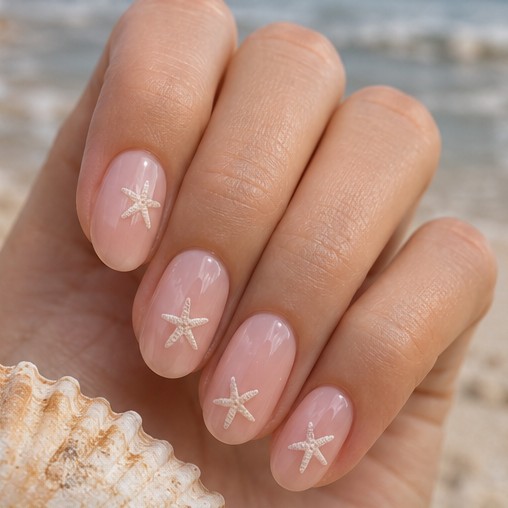
A tiny starfish on a milky pink base gives you beach vacation nails with a softer palette. Paint one white starfish slightly off-center and angle an arm toward the tip. On short squoval nails, shrink the shape until you can see pink around all five arms.
Start with a small center dot and pull five short strokes outward with a detail brush. Give the strokes gentle curves and slightly different lengths for a hand-painted feel. A few tiny dots inside the arms can add texture if you have enough space. One accent nail per hand keeps the set easy to wear with everyday outfits.
10. Deep Blue Ocean Marble Nails
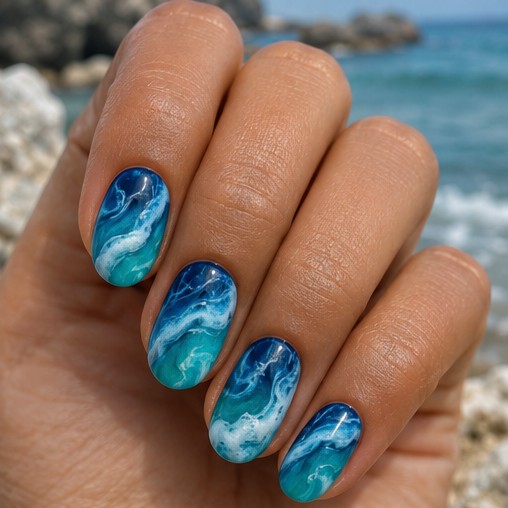
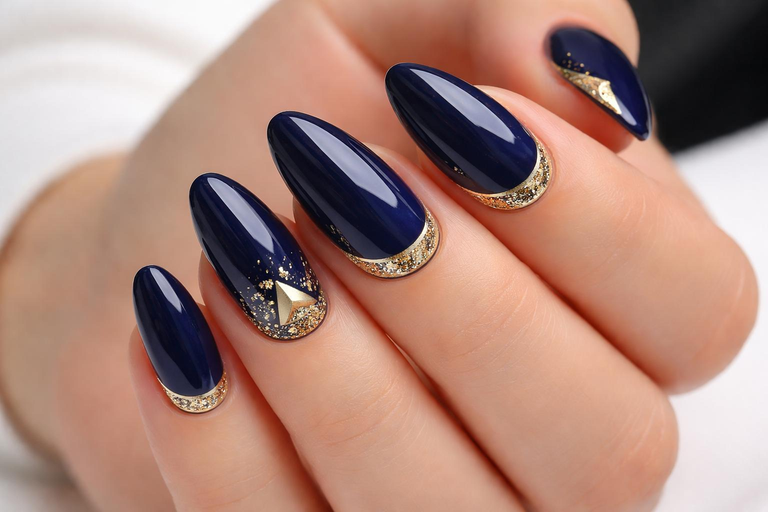
If you like bold nails, deep blue marble brings the most movement of the bunch. Start with a rich ocean blue and swirl in turquoise and a touch of white. Use more blue at one end of the nail and concentrate the white near the turquoise to suggest sea foam.
How much swirling is enough? For regular polish, work on one nail at a time and pull a fine brush through a few small drops while the colors are wet. Stop while you can still see separate streaks. Try marble on two nails and use solid deep blue on the others so the swirls have a little breathing room.
How to Choose Your Beach Vacay Nails
Match the design to the time you have and the amount of detail you enjoy. A few blue dots can come together quickly at home, while raised shell ridges or evenly placed stripes are good designs to bring to a nail tech. If you’re choosing a look for an entire trip, think about what you’ll wear most often and pick colors you’ll enjoy seeing in your photos.
- Short nails — Choose slim French tips, tiny starfish, or small dot clusters.
- Long nails — Try a sunset blend, larger hibiscus accents, or flowing ocean marble.
- Quick DIY — Keep most nails solid and add a wave or a few dots to one accent nail.
- Salon appointment — Save your favorite photo and point out the details you want, including the base color and the number of accent nails.
Keep Your Beach Manicure Looking Fresh
Give yourself plenty of drying time if you use regular polish, especially if you plan to pack, zip bags, or put on shoes right afterward. Apply a base coat and finish with a top coat, sweeping a thin layer over the free edge of each nail. If you spot a tiny chip mid-trip, dab matching polish into the gap, let it dry, and seal it with clear polish.
Pick a Design and Make It Yours
Turquoise tips and white waves keep things simple, while sunset ombré, hibiscus, and ocean marble give you more room to play with color. Save the photo you’d be happiest wearing for a week, then change one detail to make the look yours. Your nails can go on vacation a day before you do.